My go-to recipe for Bobotie


Copied here in case the website / recipe disappears.

https://www.bbcgoodfood.com/recipes/bobotie

Bobotie

Save recipe

Print

Bobotie

By 

A star rating of 4.7 out of 5.185 ratingsRate186 comments

Magazine subscription – your first 5 issues for only £5!

  • Preparation and cooking time
    • Prep:30 mins
    • Cook:40 mins
  • Easy
  • Serves 6

Pronounced ba-boor-tea, this much-loved South African dish is a delicious mixture of curried meat and fruit with a creamy golden topping, not dissimilar to moussaka

HighlightNutrientUnit
kcal386
fat16g
saturates6g
carbs20g
sugars13g
fibre1g
protein43g
low insalt0.97g

Ingredients

  • 2 slices white bread
  • 2 onions, chopped
  • 25g butter
  • 2 garlic cloves, crushed
  • 1kg packet lean minced beef
  • 2 tbsp Madras curry paste
  • 1 tsp dried mixed herbs
  • 3 cloves
  • 5 allspice berries
  • 2 tbsp peach or mango chutney
  • 3 tbsp sultana
  • 6 bay leaves

For the topping

  • 300ml full-cream milk
  • 2 large eggs

Method

  • STEP 1Heat oven to 180C/fan 160C/gas 4. Pour cold water over the bread and set aside to soak.
  • STEP 2Meanwhile, fry the onions in the butter, stirring regularly for 10 mins until they are soft and starting to colour. Add the garlic and beef and stir well, crushing the mince into fine grains until it changes colour. Stir in the curry paste, herbs, spices, chutney, sultanas and 2 of the bay leaves with 1 tsp salt and plenty of ground black pepper.
  • STEP 3Cover and simmer for 10 mins. Squeeze the water from the bread, then beat into the meat mixture until well blended. Tip into an oval ovenproof dish (23 x 33cm and about 5-6cm deep). Press the mixture down well and smooth the top. You can make this and chill 1 day ahead.
  • STEP 4For the topping, beat the milk and eggs with seasoning, then pour over the meat. Top with the remaining bay leaves and bake for 35-40 mins until the topping is set and starting to turn golden.

EU – GDPR / Clubhouse


It is difficult to be positive about anything GDPR. Sure, protecting data is really important but what is the end game? It seems that for GDPR fanatics it is the ability to scream and shout about injustices and privacies to the world, demanding attention, yet they feel they should have privacy as well. It is a contradiction in terms to say the least. The best analogy is a screaming little brat throwing a temper tantrum while the parents carry on as if this is normal behaviour and all around should accept this as the norm and who are they to judge.

Here is an example:

https://www.linkedin.com/pulse/clubhouse-next-privacy-nightmare-youve-never-heard-alexander-hanff/

It starts with

TLDR; it is shit, it is massively unlawful – stay away!

“Hi Alex I just got an invite to Clubhouse. What do you think of the platform? I can send you an…..

And the dribble ends with…

Clubhouse is a shining example of HOW TO BREAK EU LAW – they are so good at it they could and probably should, write a book on the subject.

Rumour has it they are seeking investment at a valuation of 1 Billion United States Dollars! – you don’t find that sort of change down the back of the sofa. My advice to potential investors/hedgefunds is, you REALLY need to do better due diligence if you think investing in this toxic venture is a good idea – as coincidence happens, my company does regular consultations on investment and M&A due diligence in relation to privacy and data protection compliance so perhaps throw some of those BILLIONS! our way to save you a pretty penny and some rather embarrassing conversations at the 19th in the (ahem) clubhouse..

I have my own opinions about this temper tantrum brats but suffice to say more and more will be following the US model where you get a big popup stating that you are in the EU region and therefore you are not grown up enough to wipe your own ass and can’t use this.

So, more and more web sites, Apps, etc will have automatic systems to ban all EU members or GDPR tsars from even accessing the systems. And rightly so.

OK, OK, is there an answer for the cry babies, well no but there is one for privacy. Standardise all system access to 3 IP V6 addresses per person, thingy or what ever. One address is for Business, one for Personal and one for Stealth. Create a secure access site where you set your credentials and details and then associate your chosen IP V6 address while in session. So in essence, split your online persona from your real persona and only make the connection when needed. Everyone and his dog can then have access to your online persona while your private details stay private.

Use the plug-in Teekesselchen to find duplicates of photos


Logo

Tutorial

http://www.bungenstock.de/teekesselchen/doc/v1/en/tutorial.php

This tutorial shows you how you can utilize the plug-in Teekesselchen to find duplicates of photos. There are a couple of reasons why duplicates appear in your catalogs and is just a question of time until you encounter them.

Teekesselchen uses the meta-data of your photos to detect duplicates. The capture time is the essential value but only supports seconds as smallest resolution. Thus, it can happen that Teekesselchen marks two different photos as duplicates, e.g. from a continuous shooting. If this happens then you should use the ExifTool option to compare more meta-data. You can find this option on the Rules tab (go to the help page). But please keep always in mind, Teekesselchen does not delete any photos on its own!

So please start Lightroom and follow the instructions step by step. In order to see results, it is a good idea to start with a catalogue which contains duplicates.

Step 1: Select Photos

There are a couple of ways how you can determine which photos shall be checked. You can select a whole catalog, folders and collections. If you select 2 or more photos then this selection will be checked. If you select 1 or no photo then the plug-in takes all photos from the current grid view. Take a look at the following screen-shot. In this case Teekesselchen will check all 14429 photos because no photo is selected (the navigator is empty).Nothing Selected

No photo is selected

In the following screen-shot Teekesselchen will only check the 4 selected photos with the numbers 21 – 24.4 Selected

4 selected photos

Step 2: Open Teekesselchen

Keep the photos selected and open Teekesselchen from the menu with Library > Plug-in Extras > Find Duplicates.Path to Plugin

Open the plug-in

Step 3: Kick Off

The following dialog should pop up:Teekesselchen Dialog

Summary tab

You see the Summary tab with all relevant informations at a glance. In this case I use the collection of my last trip to India. Teekesselchen tells me that it will check 886 photos and that duplicates are marked with the keyword Duplicate. It will also create a smart folder with the name Duplicates. This smart folder uses a keyword based rule and will contain all photos with the keyword Duplicate. Virtual copies of photos will be ignored and this is in most cases the right behavior. Duplicates will be marked with a special Lightroom flag which indicates them as rejected.

Click on the button Find Duplicates and a new progress dialog pops up.Progress Bar

Progress dialog

After the run a new summary dialog pops up. It informs about the number of found duplicates and the skipped items. There are usually two reasons why Teekesselchen skips a content. Either your selection criteria is the reason, e.g. when ignore virtual copies is activated, or the content itself is not proper, e.g. a video.Info Dialog

Summary dialog

Click on OK and go to the collection Duplicates. You should see a grid view with all originals and duplicates.Duplicates Collection

Select the collection Duplicates

All photos in this collection are marked with the keyword Duplicate but not all photos are marked as rejected. If you are fine with the selection and you want to delete the duplicates then you must go back to the catalog before you can call Photo > Delete Rejected Photos … . Lightroom does not allow the use of this menu item in smart collections.Duplicates Collection

Open “Delete Rejected Photos…”

Please be aware of the fact that this delete operation will remove all photos with the deletion flag and not only the duplicates from the last run.

Improve Sorting with Labels

The order of the results in the selected smart collection for duplicates is sometimes not optimal. In order to improve the relation between the original and its duplicates you can now use labels. A label is usually associated with a color and if you use labels on your own, e.g. in your workflows, you should not use the following options. Please activate the following option on the Marks tab:Abuse color labes

Use “Abuse color labels for sorting.”

After the run should sort the result by Label Text:Abuse color labes

Use “Sort: Label Text”

Now open the “Library Filter” at the top by selecting “Metadata”:Abuse color labes

Use “Sort: Label Text”

You can see a lot of generic labels, depending on the number of duplicates. The preferred original, which depends on the prefer rules on the “Marks” tab, is labeled with TK#_??_keep and all related duplicates are labeled with TK#_??_x. ?? stands for an arbitrary combination of letters and has no meaning. It is used to distinguish the different original/duplicates combinations. You can now extract a combination by selecting two related labels. The following example illustrates it:Select labels

Select two related labels

TK#_ba_keep selects the original and TK#_ba_x all duplicates. If you are not sure about the results of Teekesselchen then you should check each combination before removing or deleting any photos.

BRAISED PORK BELLY IN SOY SAUCE


BRAISED PORK BELLY IN SOY SAUCE

JUMP TO RECIPERECIPE INDEXBraised Pork Belly in Soy Sauce (Tau Yew Bak) – pork belly in intensely flavorful soy sauce. The taste is complex, sophisticated, and addictive.

Braised Pork Belly in Soy Sauce (Tau Yew Bak) recipe - Pork belly is steeped in an intensely flavorful soy sauce. The taste is complex, sophisticated, addictive, and utterly delectable.

CHINESE TAU YEW BAK

Since my second sister came into town, we have been cooking up a storm. (Previously, we have made pineapple fried rice and salted fish bones curry.)

We have also been reminiscing our fond memories of our late parents—sharing the stories of our times with them and those days when we were growing up. Naturally, we talked about the delicious foods that my late mother used to cook for our family and the many dishes that she prepared which we missed dearly although the tastes still linger on our taste buds.

As my second sister is many years older than me, she had the opportunity to learn more about cooking from my late mother. We grew up in a big and poor family, so since she was 12 years old, she was tasked with housework and kitchen chores, including cooking for the whole family. Because of that, she has acquired and inherited most of our family recipes.

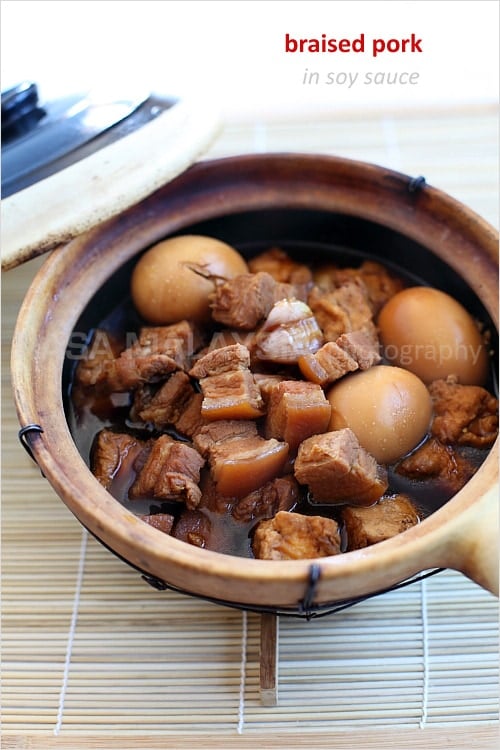
Braised Pork and Eggs in a pot, deliciously made.

TENDER BRAISED PORK BELLY

A couple of days ago, we talked about making my mother’s braised pork belly in soy sauce, or tau yew bak (in Hokkien)—one of the many family recipes that my mother excelled in.

Her tau yew bak was legendary; the pork belly was always tender, juicy, and they are steeped in an intensely flavorful soy sauce. The taste was complex, sophisticated, addictive, and utterly delectable. There were always extras such as hard-boiled eggs, tofu, and sometimes, potatoes and mushrooms.

When my parents came to visit us in San Francisco 10 years ago in 2000, I managed to learn my mother’s tau yew bak recipe. I volunteered to make the dish, following the instructions that she had briefed me during her stay.

I added some cracked whole white peppercorn (her secret ingredient!) and slowly braised the pork belly over low heat. The result was rather satisfactory and adequate, in fact, it was delicious but it is never going to be as good as my mother’s version. My sister said that it lacked the taste of “mother,” which, unfortunately, something I could never ever recreate.

Close up of pork belly braised along with eggs in soy sauce.

Here is my family recipe of braised pork belly in soy sauce or tau yew bak. It’s a savory dish that goes extremely well with steamed white rice, esspecially with a side of sambal belacan. I hope you like the recipe and get to try out one of the many great tastes of my childhood.

WHAT DISHES TO SERVE WITH THIS RECIPE?

This meal is best served with steamed rice. For a wholesome meal and easy weeknight dinner, I recommend the following recipes.

HOW MANY CALORIES PER SERVING?

This recipe is only 611 calories per serving.

Fried rice

FRIED RICE

chow mein.

CHOW MEIN

Sesame Oil Chicken

SESAME OIL CHICKEN

Ginger Soy Bok Choy

GINGER SOY BOK CHOY

5 Secrets to 20 Min Dinners

Get tricks for quick & easy meals!YES, I WANT ITYIELD: 4 PEOPLE

BRAISED PORK BELLY IN SOY SAUCE RECIPE

Braised Pork Belly in Soy Sauce4.5 Stars (68 Reviews)PRINT

Braised Pork Belly in Soy Sauce (Tau Yew Bak) recipe – Pork belly is steeped in an intensely flavorful soy sauce. The taste is complex, sophisticated, addictive, and utterly delectable.PREP TIME10 minutesCOOK TIME50 minutesTOTAL TIME1 hour

INGREDIENTS

  • 1 lb. pork belly, cut into small pieces
  • 4 cups water
  • 1 head garlic, lightly pounded with the back of a cleaver
  • 1 tablespoon white peppercorn, smashed and cracked
  • 5 hard-boiled eggs
  • 8 oz. fried tofu/bean curd
  • 4 tablespoons soy sauce
  • 3 tablespoons sweet soy sauce, kecap manis
  • 1-2 tablespoons dark soy sauce, or until it reaches your desired color
  • Salt to taste

INSTRUCTIONS

  1. Heat up a pot or preferably a big clay pot with 4 cups of water. Bring it to boil and then add in the garlic, pork belly, and cracked peppercorns.
  2. Bring the pork belly to boil before adding the hard-boiled eggs, fried tofu, soy sauce, sweet soy sauce and dark soy sauce.
  3. Lower the heat to medium and braise the pork for 30 minutes or so until the pork belly is is cooked through and become tender. Add salt to taste. Continue to simmer on the lowest heat for another 15-20 minutes. Dish out and serve hot with steamed white rice.

Nutrition Information

Serving Size

4 peopleAmount Per ServingCalories611Total Fat69gSaturated Fat24gCholesterol314mgSodium1628mgCarbohydrates18gFiber1gProtein26g

CRISPR vs COVID-19: how can gene editing help beat a virus?


CRISPR vs COVID-19: how can gene editing help beat a virus?

CRISPR vs COVID-19: how can gene editing help beat a virus?

Jennifer StraitonPublished Online:2 Nov 2020https://doi.org/10.2144/btn-2020-0145

Known to be a sturdy weapon in a scientist’s arsenal, how has the gene editing tool CRISPR been applied in the fight against COVID-19?

When SARS-CoV-2 was first identified, many researchers redirected their focus to the study of this novel virus and the disease it causes. Those working with CRISPR were no exception, and the gene editing tool was soon brought to the frontlines in the worldwide war against COVID-19. With the technology based upon a naturally occurring bacterial gene editing system that plays a key role the prokaryotic defense against viral infection, the CRISPR—Cas system is designed to fight viruses. The challenge facing researchers now is how best to utilize its natural ability and optimize it for human benefit.

Here, scientists have indeed risen to the occasion and CRISPR technology has been successfully used to develop rapid diagnostic tests for COVID-19 – gaining its first US FDA (MD, USA) approval in the process [1]. Research continues as such tests are now being developed for widespread clinical use, with multiple companies in the race to fill the ever-widening gap in the market left by reagents for PCR-based COVID-19 tests running out and dwindling testing capacity. In other areas, scientists have looked to CRISPR as a potential therapeutic, utilizing its targeted enzymatic activity to destroy SARS-CoV-2 RNA and prevent viral replication.

CRISPR has been well and truly deployed in the fight against COVID-19, but what potential does it hold in controlling this and future pandemics?

Targeted detection with CRISPR-based diagnostics

Testing has been a key factor in many nations’ COVID-19 response policies, with PCR-based testing taking center stage as the gold standard of diagnostic tests. However, a long wait for results, a labor-intensive protocol and a dwindling supply of reagents has led to many looking for alternative testing options. To keep up with the mass testing protocols that many experts have deemed necessary to control the spread of the virus, the development of a rapid, at-home diagnostic test could help to turn the tide on the ever-increasing global case numbers. For this, many have turned to CRISPR, with its nucleotide-targeting ability making it optimal for detecting the presence of viral RNA.

Utilizing CRISPR as a diagnostic tool is not a novel idea; the companies Sherlock Biosciences (MA, USA) and Mammoth Biosciences (CA, USA) – co-founded by CRISPR pioneers Feng Zhang and Jennifer Doudna, respectively – were each launched with the goal of developing CRISPR-based diagnostic tools [2,3]. At the start of the COVID-19 pandemic, both companies shifted their attention towards creating a system that could detect the SARS-CoV-2 virus, and in May 2020 it was Sherlock Biosciences that made history in gaining the first FDA-authorized use of CRISPR.

Speaking to BioTechniques, Sherlock co-founder and CEO Rahul Dhanda noted, We at Sherlock see this as a historic moment for the organization but also for the field in general because what has always been this very robust technology in CRISPR has become validated as a real solution to healthcare.

Their SHERLOCK CRISPR SARS-CoV-2 test kit was granted Emergency Use Authorization from the federal authority, meaning it can be used to test for SARS-CoV-2 in certified laboratories. The COVID-19 test kit works by programming the CRISPR system to detect the genetic signature of SARS-CoV-2, utilizing gRNA that is complementary to a specific section of the viral genome. If the target section is detected in a sample, the CRISPR system is activated and a detectable signal – in this case a fluorescent marker – is released [4,5].

So far the accuracy has been incredibly high,” explained Dhanda when asked about the benefits of SHERLOCK relative to PCR-based testing. “We have done our own critical analysis for the FDA authorization that demonstrated 100% accuracy, sensitivity and specificity. In addition, it is much faster; while PCR can take a number of hours, this is done in about an hour. The other benefit is it is relying on another set of reagents and so some of the limitations in the supply chain that have been affecting the use of RT-PCR are not necessarily limiting Sherlock’s test.

While the technology is promising, CRISPR-based tests are still limited to the lab. The real challenge now is in creating a point-of-care testing system that enables rapid, accurate testing in any setting. To achieve this, Sherlock are in collaboration with multiple partners, for example, binx health (MA, USA) with whom they are working alongside to create the world’s first point-of-care diagnostic test for COVID-19. Already this collaboration has brought the turnaround time of the test down to 20 minutes, and it is hoped that the large-scale production of such a test will bring the price per test down and increase accessibility.

CRISPR-based competition: creating the first clinically viable test

While Sherlock made history in gaining FDA approval for their test, developing a clinically viable counterpart is still hotly contested. The race to create a viable CRISPR-based diagnostic is close, and the DETECTR assay from a group affiliated with Mammoth Biosciences provides a second option for an alternative COVID-19 test. With a CRISPR–Cas12-based system, the DETECTR test is able to identify the presence of the virus from nasopharyngeal or oropharyngeal swab samples [6]. As with the SHERLOCK system, the test has a quick turnaround time, does not require the complex lab equipment and has displayed similar levels of sensitivity and specificity to qRT-PCR tests.

We need faster, more accessible and scalable diagnostics,” commented Mammoth CTO Janice Chen. “The point-of-care testing space is ripe for disruption and CRISPR diagnostics have the potential to bring reliable testing to the most vulnerable environments [7].

Outside of the biotech industry sector, academic research groups are also throwing their hat into the ring to create a test. Publishing their work in PLoS Pathogens, a Chinese research group recently announced the development of their CRISPR-COVID test [8]. Described by the authors as “an isothermal, CRISPR-based diagnostic for COVID-19 with near single-copy sensitivity,” their test takes just 40 minutes to produce results.

In addition, recently researchers from the University of Connecticut (USA) validated the clinical feasibility of their All-In-One-Dual CRISPR-Cas12a (AIOD-CRISPR) method, utilizing a low-cost hand warmer as an incubator and generating results in as little as 20 minutes. By using a hand warmer, the researchers eliminated the need for an electrical incubator and thus created an instrument-free point-of-care diagnostic [9]. “Such a simple, portable and sensitive detection platform has the potential to provide rapid and early diagnostics of COVID-19 and other infectious diseases at home, in the doctor’s office, and even at drive-thru testing sites,” commented group leader Changchun Liu [10].

With multiple groups working towards the goal of a CRISPR-based diagnostic, it is just a matter of time before the technique is cleared for clinical use. In the timeline of a pandemic, this cannot come soon enough, with many having already highlighted the need for mass testing with cheap, rapid point-of-care tests in order to overcome a deadly second wave [11]. However, whether ready in time to have clinical benefit in this pandemic or in the next, precedent has been set for CRISPR as a diagnostic and once again it has proven itself a vital lab method in creating the next generation of tests.

PAC-MAN vs the pandemic: therapeutics going retro

Therapeutic applications for CRISPR are on the rise, with the technology playing a key role in the development of potential cures for a variety of genetic diseases by directly editing the genome [12]. Meanwhile, taking a different approach and looking outside the human genome, researchers from Stanford University (CA, USA) are working towards a CRISPR-based therapeutic for infectious disease. Beginning their work targeting the influenza virus, the team have followed suit of many before them and refocused the aim of their gene-targeting antiviral agent towards COVID-19 and the global battle against the pandemic [13].

The Prophylactic Antiviral CRISPR in huMAN cells – or PAC-MAN – technology includes the Cas13 enzyme and a strand of gRNA that is specific to nucleotide sequences in the SARS-CoV-2 genome. In targeting and subsequently destroying the viral genome, PAC-MAN technology effectively eliminates the threat of the virus by preventing viral replication. Further, by targeting RNA sequences that are conserved across all members of the Coronaviridae family, the researchers suggest that PAC-MAN could become a pan-coronavirus inhibition strategy that is effective against all disease-causing coronaviruses [13].

While PAC-MAN technology has already proven its worth as a molecular tool, translating this into a clinically viable treatment has its issues – the most prominent being the lack of an effective delivery mechanism. This is a fundamental challenge faced across the field of gene editing, as the component parts of CRISPR are just too large to enter the target cells [14]. Various delivery mechanisms are being investigated to overcome this issue, and the Stanford team have collaborated with a group at the Molecular Foundry (CA, USA) who specialize in the development of synthetic molecules called lipitoids which hold potential as an effective CRISPR delivery system.

Lipitoids – a type of synthetic peptide – have been shown to be nontoxic to humans and are able to effectively deliver nucleotides to cells by encapsulating them into nanoparticles approximately the size of a virus. When combined with the PAC-MAN technology, the lipitoid Lipitoid 1 performed well and, in a sample of human epithelial lung cells, was effective at reducing the amount of SARS-CoV-2 in a solution by over 90% [15]. The next step for the Stanford-based group is to test their PAC-MAN/lipitoid therapy in an animal model against a live SARS-CoV-2 virus.

An effective lipitoid delivery, coupled with CRISPR targeting, could enable a very powerful strategy for fighting viral disease not only against COVID-19 but possibly against newly viral strains with pandemic potential, commented Michael Connolly, leader of the Molecular Foundry group [15].

Lose the battle, win the war

Even in the fast-paced field of COVID-19 research, a clinically viable CRISPR-based therapeutic may be a long way off. While COVID-19 may beat CRISPR in this current battle, the pan-coronavirus applications of the PAC-MAN technology likely mean that CRISPR will come out on top in the war against future coronaviruses.

In the current COVID-19-centric news cycle, advances not directly related to COVID-19 treatments are often viewed as a side note. Attention is thoroughly focused on what developments can do to rid the world of the ongoing pandemic and get things ‘back to normal’. That being said, it is worth noting that the technology developed in the face of COVID-19 can be applicable for many other infectious diseases, and the advances in CRISPR technology developed today will likely be beneficial for decades to come.

INSTANT POT STICKY RICE


INSTANT POT STICKY RICE

AMY + JACKY·FEBRUARY 21, 2017·6 MIN READSUPER EASY . 30 MINS .  ASIAN

Instant Pot Sticky Rice (Pressure Cooker Sticky Rice)! Quick & easy way to make flavorful, evenly cooked Glutinous Rice with no soaking.

Please Share if you enjoy our recipes 🙂

No more wet & mushy Instant Pot Sticky Rice (Pressure Cooker Sticky Rice)! Quick & easy way to make flavorful & evenly cooked Glutinous Rice with no soaking requiredYes, really 😉Check out our #CookingTogether Weekly Giveaway!We recommend the Instant Pot DUO60 and Instant Pot DUO Plus 60. Also check out Our Handpicked Instant Pot Accessories

Jump to: Cooking Tips | Recipe

Many dear readers enjoyed our Jasmine Rice, Brown Rice, and Basmati Rice experiments, and have requested for our Instant Pot Sticky Rice Recipe.

Some of you have told us your Instant Pot Sticky Rice turned out wetmushygummyundercooked

We heard you! Yes. As easy as it looks, it’s a bit tricky to perfect any type of Pressure Cooker Rice, especially Instant Pot Sticky Rice.

The Water to Rice Ratio is like the Golden Key to the Perfect Rice Treasure Box.

Thanks for your patience as we test & perfect this recipe. 🙂

So, time for another Instant Pot Rice Experiment!

No more wet and mushy Instant Pot Sticky Rice (Pressure Cooker Sticky Rice)! Quick & easy way to make flavorful, evenly cooked Glutinous Rice with no soaking.

SUBSCRIBE FOR FREE RECIPES + TIPS

Tried & True Recipes Delivered To Your Inbox Weekly. 100% Free!SUBSCRIBE!

We respect your privacy and take protecting it seriously. Please read our privacy policy here

First Off, What is Sticky Rice?


Sticky Rice (aka Sweet Rice or Glutinous Rice) is a non-translucent, opaque milky-colored, long grain rice.

Due to very low amylose content, it becomes especially sticky when cooked.

It’s commonly used in many Southeast and East Asian dishes. Some of my favorite comfort food & dim sums are made with glutinous rice or glutinous rice flour (ground glutinous rice):

  • Lo Mai Gai 糯米雞
  • Deep Fried Glutinous Rice Dumplings 咸水角
  • Japanese Mochi もち
  • Thai Sweet Sticky Rice with Mango (Kow Neuw Mamuang)…

Man, I’m drooling just thinking about these… hehe~

Despite the name, Glutinous Rice is gluten-free.

Normally, authentic Sticky Rice eaten in Laos or Thailand is pre-soaked for several hours (or even overnight!), then steamed in a Special Sticky Rice Steamer Pot & Basket, which then kneaded with a wooden paddle.

But, with our Instant Pot Electric Pressure Cooker? 

Behold the Golden Key to the Easy & Quick No-Soak Instant Pot Sticky Rice!

No more wet and mushy Instant Pot Sticky Rice (Pressure Cooker Sticky Rice)! Quick & easy way to make flavorful, evenly cooked Glutinous Rice with no soaking.

Instant Pot Sticky Rice Experiment


What We Look For in Sticky Rice?

  • Evenly cooked
  • Remain intact & separated (not mush)
  • Tender yet sticky & chewy
  • Dry (not soggy)
  • Flavorful & fragrant

We conducted 5+ tests with Glutinous Rice using different amounts of liquid, cooking time, pressure release methods, Pot-in-Pot (PIP) or directly in the Pot in our Instant Pot Electric Pressure Cooker.

Here are the Instant Pot Sticky Rice Experiment Results:

Instant Pot Sticky Rice Experiment Results
(Click photo to enlarge the chart)

*HP = High Pressure; NR = Natural Release

After playing around with the various factors, we achieved our desired results with Test #5.

You’ll Enjoy Instant Pot Sticky Rice Because:

  • Huge Time Saver: Cut short preparation & cooking time!
  • No soaking required!!
  • Super easy to make – no need to tend the steamer to ensure it’s evenly cooked (no need to turn the rice or check if the steamer is running dry)
  • Easy to achieve consistent yummy results
  • No need to purchase special equipment

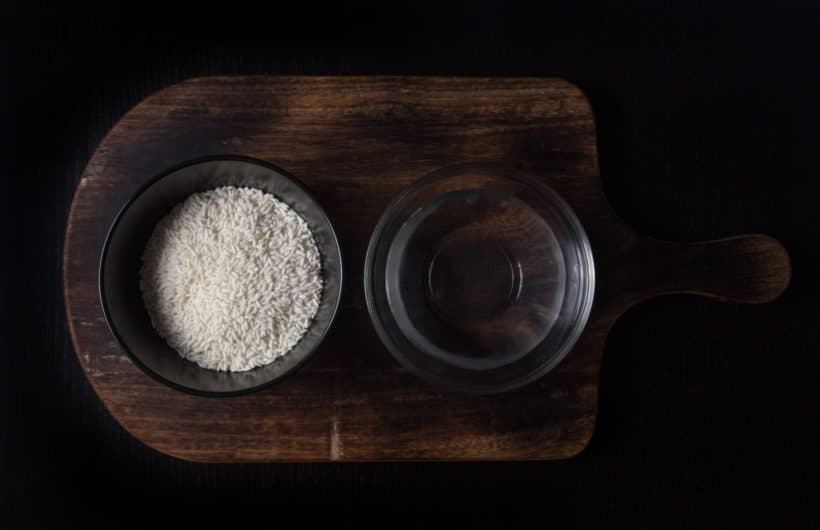
Ingredients for Instant Pot Sticky Rice


Instant Pot Sticky Rice Recipe
  • 1 cup (200g) Glutinous Rice (No soaking required)
  • 2/3 cup (167ml) cold tap water

Tools for Instant Pot Sticky Rice


Pro Tip: it’s important to use a stainless steel bowl to hold the glutinous rice when following this recipe.

Stainless steel bowl is best for the pot-in-pot method as it conducts heat fast. Optimal cooking time & end results may differ if you use other types of containers.

Instructions for Instant Pot Sticky Rice


Step 1
Pressure Cook Glutinous Rice


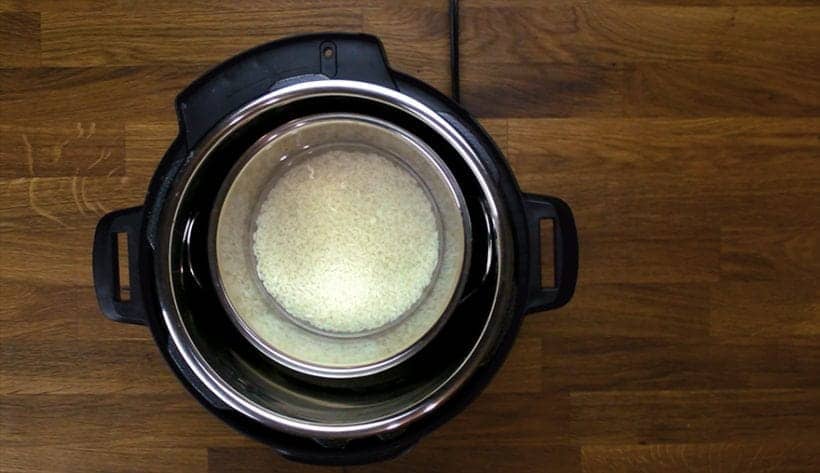
First, add 1 cup (250ml) of cold tap water and a trivet in your pressure cooker.

Add 1 cup (200g) of glutinous rice in a stainless steel bowl. Then, place the stainless steel bowl on the trivet.

Pour 2/3 cup (167ml) of cold tap water into the stainless steel bowl. Ensure all the glutinous rice is submerged in the water (as shown in photo below).

Instant Pot Pot in Pot Sticky Rice

Close the lid immediately and pressure cook at:

  • Pressure Cooking Method: High Pressure for 12 minutes, then Natural Release (roughly 5 – 7 minutes)

Open the lid carefully.

*Pro Tip – Doubling Recipe with 2 Cups of Glutinous Rice: pressure cook at High Pressure for 25 minutes + Natural Release.

Step 2
Fluff & Serve Instant Pot Sticky Rice


Remove the stainless steel bowl from the pressure cooker.

Gently fluff the Instant Pot Sticky Rice to release the steam, and serve warm with your main dish!

Fun Fact: In some Asian countries such as Thailand & Laos, they eat Sticky Rice with their hands!

They’re served in adorable little bamboo baskets and you roll the rice into small ball shape with your fingers.

You can either eat it on it’s own or dip them into a sauce.

Enjoy~

No more wet and mushy Instant Pot Sticky Rice (Pressure Cooker Sticky Rice)! Quick & easy way to make flavorful, evenly cooked Glutinous Rice with no soaking.

Cooking Tips for Instant Pot Sticky Rice


1. Water to Rice Ratio: this ratio makes or breaks your path to perfecting Instant Pot Rice. So, measure them as accurately as possible for your satisfaction 🙂

Pressure Cooker Sticky Rice Recipe

2. Stainless Steel Containers: As mentioned above, it’s important to use a stainless steel bowl to hold the glutinous rice when following this recipe.

Optimal cooking time & end results may differ if you use other types of containers.

The stainless steel bowl we used is 7″ wide. If you are using a smaller bowl, increase the pressure cooking time accordingly as the overall thickness of the rice has increased.

3. Can I Double the Recipe using 2 Cups of Glutinous Rice?

Yes! For 2 cups of Glutinous rice, use this method:

  • Rice: 2 cups (400g) Glutinous Rice
  • Water: 1 1/3 cup (334ml) Cold Tap Water
  • Pressure Cooking Method: High Pressure for 25 minutes
  • Pressure Release Method: Natural Release

Other Instant Pot Rice Recipes


Instant Pot Sticky Rice (Pressure Cooker Sticky Rice)! Quick & easy way to make flavorful, evenly cooked Glutinous Rice with no soaking.

Instant Pot Sticky Rice

No more wet & mushy Instant Pot Sticky Rice (Pressure Cooker Sticky Rice)! Quick & easy way to make flavorful, evenly cooked Glutinous Rice with no soaking.4.98 from 34 votes Print Rate This RecipePrep Time: 2 minutesCook Time: 25 minutesTotal: 27 minutesServings: 2– 4Calories: 169kcalAuthor: Amy + Jacky

Ingredients

  • 1 cup (200g) Glutinous Rice (No soaking required)
  •  cup (167ml) cold water

Tools

Don’t Miss This!Jump to our Step By Step Photo Guide

Instructions

  • Pressure Cook Glutinous Rice: Add 1 cup (250ml) cold water and a steamer rack in Instant Pot.Add 1 cup (200g) glutinous rice in a stainless steel bowl. Place the stainless steel bowl on the steamer rack. Pour  cup (167ml) cold water in the stainless steel bowl. Ensure all the rice is submerged in the water.With Venting Knob in Venting Position, close the lid immediately, then turn Venting Knob to Sealing Position. Pressure Cook at High Pressure for 12 minutes + Natural Release (roughly 5 – 7 minutes). Open the lid carefully. *See notes for doubling recipe.
  • Fluff & Serve: Remove stainless steel bowl from Instant Pot pressure cooker. Gently fluff the sticky rice and serve warm with your main dish. Enjoy~

Subscribe for Free Recipes & Tips – Tried & True Recipes Weekly. 100% Free

♥ Spread the Love by sharing this recipe, so others can enjoy it too!  Thank you 🙂

Recipe Notes:

Use This Method When Doubling Recipe with 2 Cups of Glutinous Rice:

  • Rice: 2 cups (400g) Glutinous Rice
  • Water: 1 1/3 cup (334ml) Cold Tap Water
  • Pressure Cooking Method: High Pressure for 25 minutes + Natural Release

*Rate the Recipe: If you’ve tried the recipe, don’t forget to Rate the Recipe in the Comments Section. Thank you!

Nutrition:

Serving: 46g | Calories: 169kcal | Carbohydrates: 37g | Protein: 3.3g | Fat: 0.3g | Sodium: 2mg | Fiber: 0.6g Course: Rice, Side Dish Cuisine: AsianKeyword: instant pot sticky rice, pressure cooker sticky rice, sticky rice instant potTried this recipe?Mention @pressurecookrecipes or tag #AmyJacky!SOME USEFUL TIPS & RESOURCES

*Disclosure: We are an Amazon Influencer/Amazon Associate. This means that if you decide to purchase items or services on Amazon through our links on Pressure Cook Recipes to Amazon, Amazon will send a small commission to us at no additional costs to you. Thank you!
Amy + Jacky Amy + Jacky is a husband and wife team who worked directly with Instant Pot company, pressure cooker manufacturers, and 35+ restaurants. We spend hours creating well tested recipes to help millions of home cooks and chefs around the world

What is Hedera Hashgraph? – Coin Rivet


What is Hedera Hashgraph?

Th Hedera Hashgraph platform is a new form of distributed consensus. Like other peer-to-peer platforms, it removes the need for a middleman to complete transactions.

Their website reads: “The platform is lightning fast, fair, and secure and, unlike some blockchain-based platforms, doesn’t require compute-heavy proof-of-work.”

Proof-of-work refers to a piece of data which is difficult to produce but easy for others to verify. In the space of crypto, it is used on blockchains for others to verify transactions as legitimate. It helps ensure that blockchains run as transparently as possible.

Hedera Hashgraph

The Hedera site notes that the platform can handle “hundreds of thousands of transactions per second” and can “verify over one million signatures per second.”

The platform is thought to ensure that no user blocks the flow of transactions that enter the community. It also claims that no small group of people can influence the consensus order of the transactions, stating, “these features are absent from many distributed ledger technologies, but are a requirement for existing applications today.”

Asynchronous Byzantine fault tolerance

There is a reason why all of this is incredibly promising and why Hedera Hashgraph could potentially revolutionise the way applications work. This is because Hedera uses what’s known as “asynchronous Byzantine fault tolerance,” or “aBFT.”

In a podcast interview with Hidden Forces, founder and chief scientist at Hedera Hashgraph Dr Leemon Baird reveals that, “Byzantine fault tolerance (BFT) means that when you’re trying to figure out the order of transactions, there comes a moment in time when you know that you have reached consensus. Ultimately, Byzantine fault tolerance means three things: 1) we are going to come to consensus, 2) we will know when we’ve come to consensus, and 3) we’re never wrong – you’re mathematically guaranteed to reach the exact same consensus. That’s Byzantine.”

He continues on to state that BFT can either be asynchronous or partially asynchronous. But either way, they are both mathematically guaranteed to produce the same consensus.

Asynchronous Byzantine fault tolerance in the scope of Hashgraph means that it “makes no assumptions about how fast messages are passed over the internet, making it resilient to DDoS attacks, botnets, and firewalls. Hashgraph is mathematically guaranteed to reach consensus and is secure as long as less than one-third of participants are malicious.”

A DDoS attack is a malicious attack that aims to disrupt normal traffic of a targeted server. It achieves this by overwhelming the targeted server/network by flooding it with internet traffic. By preventing DDoS attacks, Hashgraph can, in theory, prevent bad influences from disrupting the platform.

The gossip protocol and other features

Another feature in Hashgraph is their implemented ‘gossip’ protocol. Nodes (computers or other devices) exchange data with other nodes to build the Hashgraph data structure that is cryptographically secure.

The Hedera site notes that “using this (the gossip protocol) as an input, nodes run the same virtual-voting consensus algorithm as other nodes. The community reaches consensus on the order and timestamp without any further communication over the internet.”

The Hedera cryptocurrency is HBAR. Since Hedera has done away with traditional proof-of-work algorithms, the HBAR token will have a high throughput, with low fees and micropayments that are practical. Decentralised application (dApps) developers will also be able to pay for services on the network using HBAR. These services include processing transactions, running smart contracts, and storing files.

The Hedera smart contracts will be written in ‘Solidity’ on their network. Decentralised applications that are built on top of the Hedera Hashgraph platform can use these smart contracts with “greater speed and efficiency than ever before.”

Final comments

The Hedera Hashgraph project is certainly ambitious in attempting to rival blockchain technology. Whilst Hashgraph is still a form of distributed ledger technology, it isn’t exactly a blockchain either. Originally, Hashgraph didn’t have open source code, since the creators of the Hashgraph algorithm had patented it.

However, in October 2018, Hedera released Hedera SDK in Java. Since the release of SDK, developers have been able to develop Hedera-based applications for use on the platform. It also supports the three services that were on offer beforehand: cryptocurrency, smart contracts, and file storage. SDK can be found on GitHub here.

Hashgraph is still relatively new, and it remains to be seen how powerful it might become. It seems as though all the foundations are there.

However, there are still lingering questions about how decentralised it is. This is because they have a governing council comprised of 39 businesses and enterprises. Hedera believe that governance will ensure “no single member has control, and no small group of members will have influence over the body as a whole.”

Despite the assurance from Hedera, realistically, it isn’t exactly fully decentralised if there is governance overseeing the platform. It’s not as though the council are inherently evil by any means, but it also isn’t exactly clear what role they have and what power they possess. It isn’t that they will do anything wrong, it is more the prospect that they could do. This is a concern shared by others, as Reddit user u/quyhp pointed out back in 2018.

The virtual voting consensus algorithm could have big implications on all future decentralised applications, though. By doing away with proof-of-work, it should enable applications and the platform itself to run quite quickly. Though only time will tell how effective it will be.

For more information and guides from Coin Rivet, click here.

WordPress resources


https://www.wpbeginner.com/start-a-wordpress-blog/

Do you want to start a WordPress blog the right way? We know that starting a blog can be a terrifying thought specially when you are not geeky. Guess what – you are not alone. Having helped over 130,000+ users create a blog, we have decided to create the most comprehensive guide on how to start a WordPress blog without any technical knowledge.

How to Start a WordPress Blog

The process is easy to follow whether you are 20 years old or 60 years old. However if you need help, our expert team will help you setup your blog for free.

Continue reading